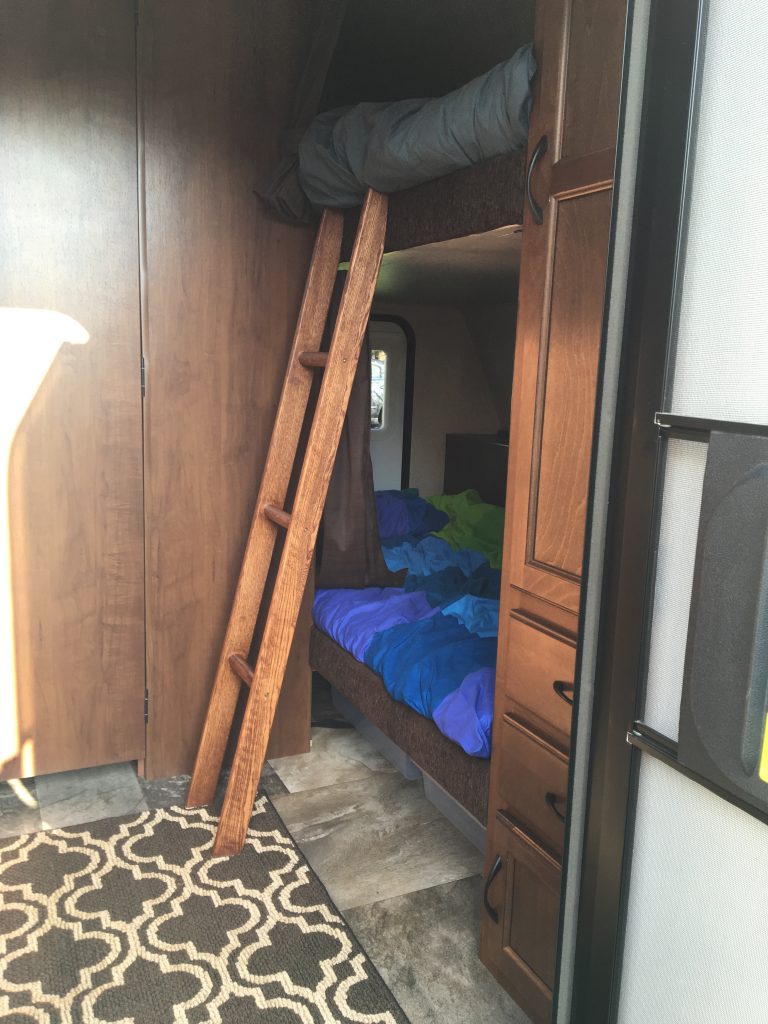
I recently purchased a 2015 Jayco Jayfeather X213 Camper. This trailer has the prefect sleeping configuration for our family with a King Size slide-out and 2 Bunks. This allows us to setup and not have to break-down the table or convert a sofa for sleeping quarters for our two children every night. The two bunks are nice but getting into them without assistance can be difficult for a child and downright impossible for an adult. To remedy this situation I looked into several commercially available ladder solutions such as the following:
Stromberg Carlson (LA-460-B) Black 60″ Bunk Ladder
But at nearly $60.00 and made of ugly metal that didn’t match the interior of the camper I passed. In addition this ladder was wider than it needed to be and needed to be fastened into one location. I found several other options while searching the internet but none fit the bill so I sketched out what I wanted on paper and came up with the following requirements:
- Movable – can be moved from side to side on the bunk if necessary – This thing is near the bathroom door and the entry door and we don’t want it to get in the way.
- Matches the decor of the trailer – The interior is wood paneled on all the storage/closets etc so the ladder should match pretty closely
- Not a vertical climb – After climbing several purely vertical bunk ladders even a slight rake on it can make a difference.
- Less cost than a commercially available version
- Wide enough to climb but narrow enough to not be in the way.
Armed with this list of requirements i sketched out a simple 3-rung ladder with a slight rake. First I determined a comfortable width. It does not need to be as wide as a standard ladder but it has to be wide enough to get one shod foot on a rung easily. After several experiments climbing a ladder and keeping within one edge of it I determined 8″ should be enough width – even for my fat feet. I then measured the distance from the top of the bunk to the floor with an approximate 10 degree rake to be around 56″. I then headed to Home Depot and purchased some lumber. I wanted something sturdy but not overly expensive so I settled for oak and selected two straight pieces with similar grain. Those who have done this before know this process likely took me as long as fabricating the ladder. If I had a better lumber yard nearby I would have went there.
Materials List:
- 2 – 1x3x8 Oak Boards
- 1 – 1 1/4″ Oak Dowel 36″ length
- 6 – #8 x 1-1/4″ Construction Screws
- 4 – #8 x 1 Wood Screws
- 2 – 2 1/2″ “L” Bracket
- Wood Glue
- Minwax English Chessnut (on-hand)
- Minwax Helmsman Spar Urethane (on-hand)
The first step is to cut the two side rails to length. Based on the measurements I chose 56″. This was done in a miter box but could also easily have been done with a hand saw. Since we want all the cuts the same on both sides it’s best to clamp the two boards together when cutting so they are symmetrical. The dimensions and angles of the cuts and holes drilled are per the following diagram. Keep in mind that there are two halves to this ladder and they are mirrored. This is most important when drilling holes. My suggestion mark the holes on on board clamp the two together and drill through with a 1/8 drill through both boards. This can later be used to center a forester bit to make the holes for the rungs in the same exact locations.
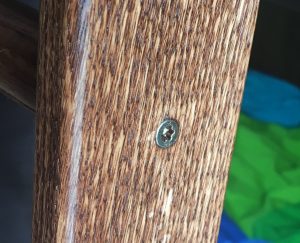
Once the cuts are made I drilled 1/8″ pilot holes all the way through. The center hole is located at the center of the ladder with the rungs 14″ apart (on center). I did a test “drill” into some scrap first with my Forstner bit to ensure a tight fit for the oak dowels. If your dowels are too big or two small, this will give you a chance to adjust the hole size with a larger or smaller bit. The holes for the rungs are recessed 1/2″ deep. The dowels were cut to 9″ lengths. Once inserted into the side rails the rungs will be 8″ wide. After the holes are drilled I ran the edges of the ladder through my router table to round off the edges. This is completely optional but I think it’s best to do. Alternatively you can “break” the edges with sandpaper. Be sure to sand all the surfaces smooth prior to finishing. The rungs were glued in place and secured with the 1-1/4″ construction screws which were countersunk into the side rails. The ladder was stained (two coats) and then Polyurethaned with 3 coats. This is going to see a lot of use and I wanted the finish to hold up to my son’s dirty hands.

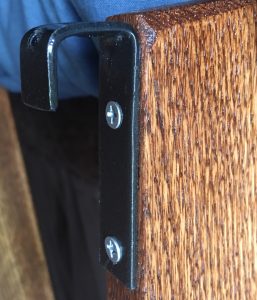
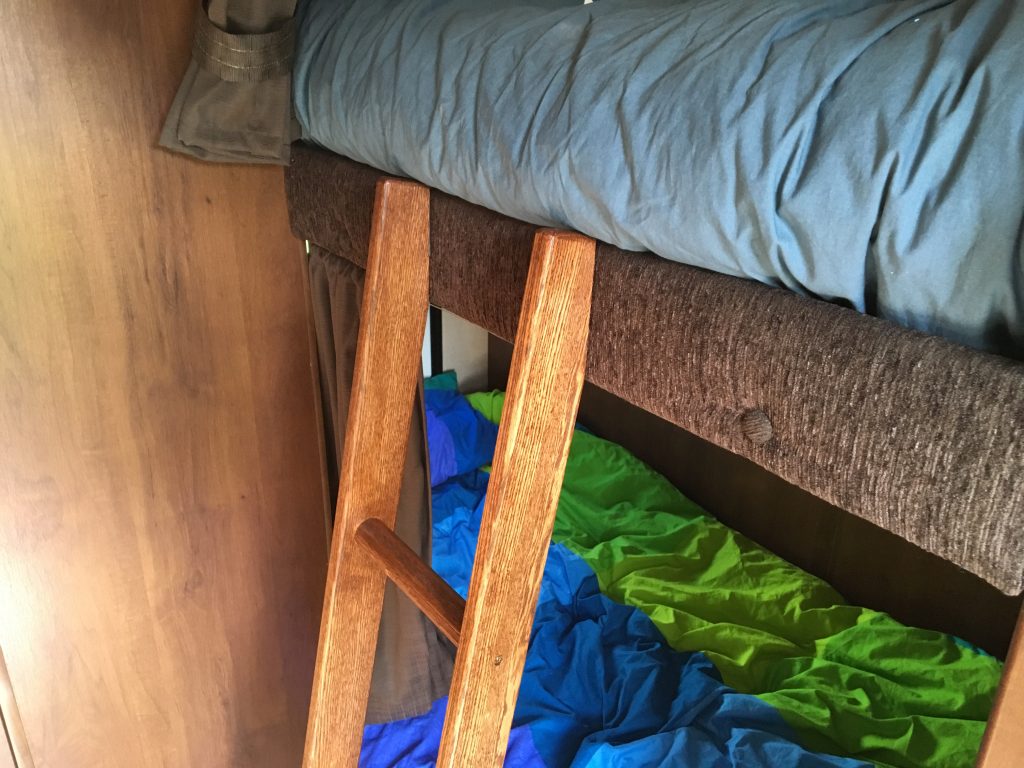
The final piece of the puzzle is the brackets to hold the ladder in place so it can’t tip back. It’s very stable without these but this makes it rock solid. These were made by taking the 2 “L” brackets and heating them up in a vice and bending one end over. To determine where to make the bend hang one over the edge of the bunk and mark it where it crosses over the inner edge. After they were bent I cut off some excess with a hack saw and spray painted them Black Rustoleum Hammered Metal Finish Spray Paint to make them look nice. You may be able to bend them without heat but more often than not they might break or weaken. These were then mounted to the bevels edge of the ladder with the 1″ #8 wood screws as pictured below.

I also added some felt pads to the bottom of my ladder to prevent any scratching to the flooring. In all I say this project came out pretty good and with material costs of about $35, having screws and stain on-hand, it also costs about half what the commercial ladder costs. A Fusion 360 CAD File can be found here (I made it after I built the ladder, just because it was quicker than doing it in Inkscape): Jayco X213 Bunk Ladder. The other modification you can see in the picture below is the single large curtain was cut into two panels so each child could have their own privacy curtain without disturbing the other. The lower curtain is held in place with a piece of safety wire attached with two eye hooks at either end of the bunks.


