In this post I will be describing the software tool chain, tools and techniques I used to create a fun engraved sign I made as a gift. Read on for more information.
Design preperation
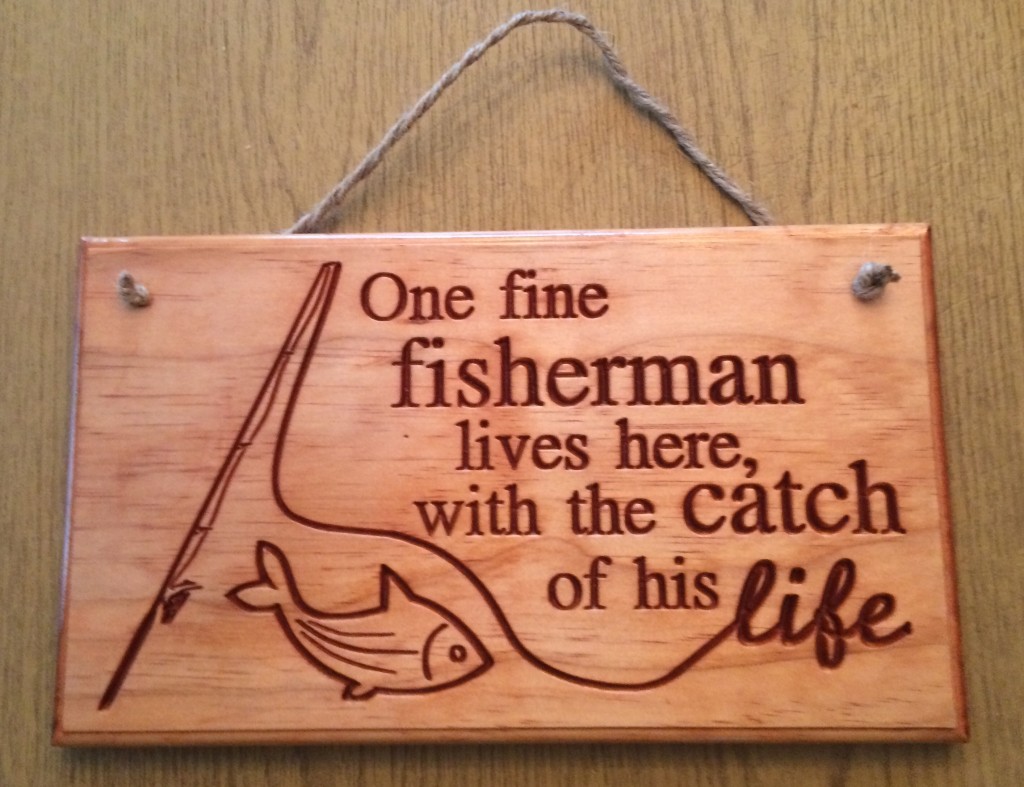
I wanted to make my mother a special gift for her birthday and my father is an avid fisherman. So after scouring the web for ideas I came across several designs I liked. I took the best of these ideas into Inkscape and mocked up some text layout with a few SVG images I found searching on the web. Ultimately I came up with a design like this:
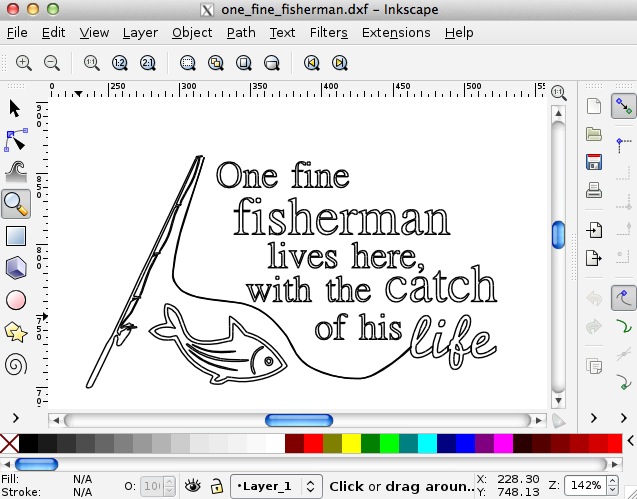
After touching up the design in Inkscape I exported it as DXF and as a bitmap. The next step in my toolchain is the excellent and free F-engrave from Scorch Works. I setup the machine and G-code generation parameters for the ShapeOko (documented here). Next I attempted bringing the DXF in but had some issues with open paths so I opted for the bitmap instead. I actually run the Windows version under Wine on my mac as I wanted the full TTF support that was compiled into the Windows Executable for other quick signs. I configured the v-carving settings for my 60° V-groove router bit along with maximum cutting depth and federates. The design height was set and the work area recalculated. Then the V-carving paths were calculated. Finally I exported the G-code to a flash drive I could bring to my old workshop PC which the Router is connected to.
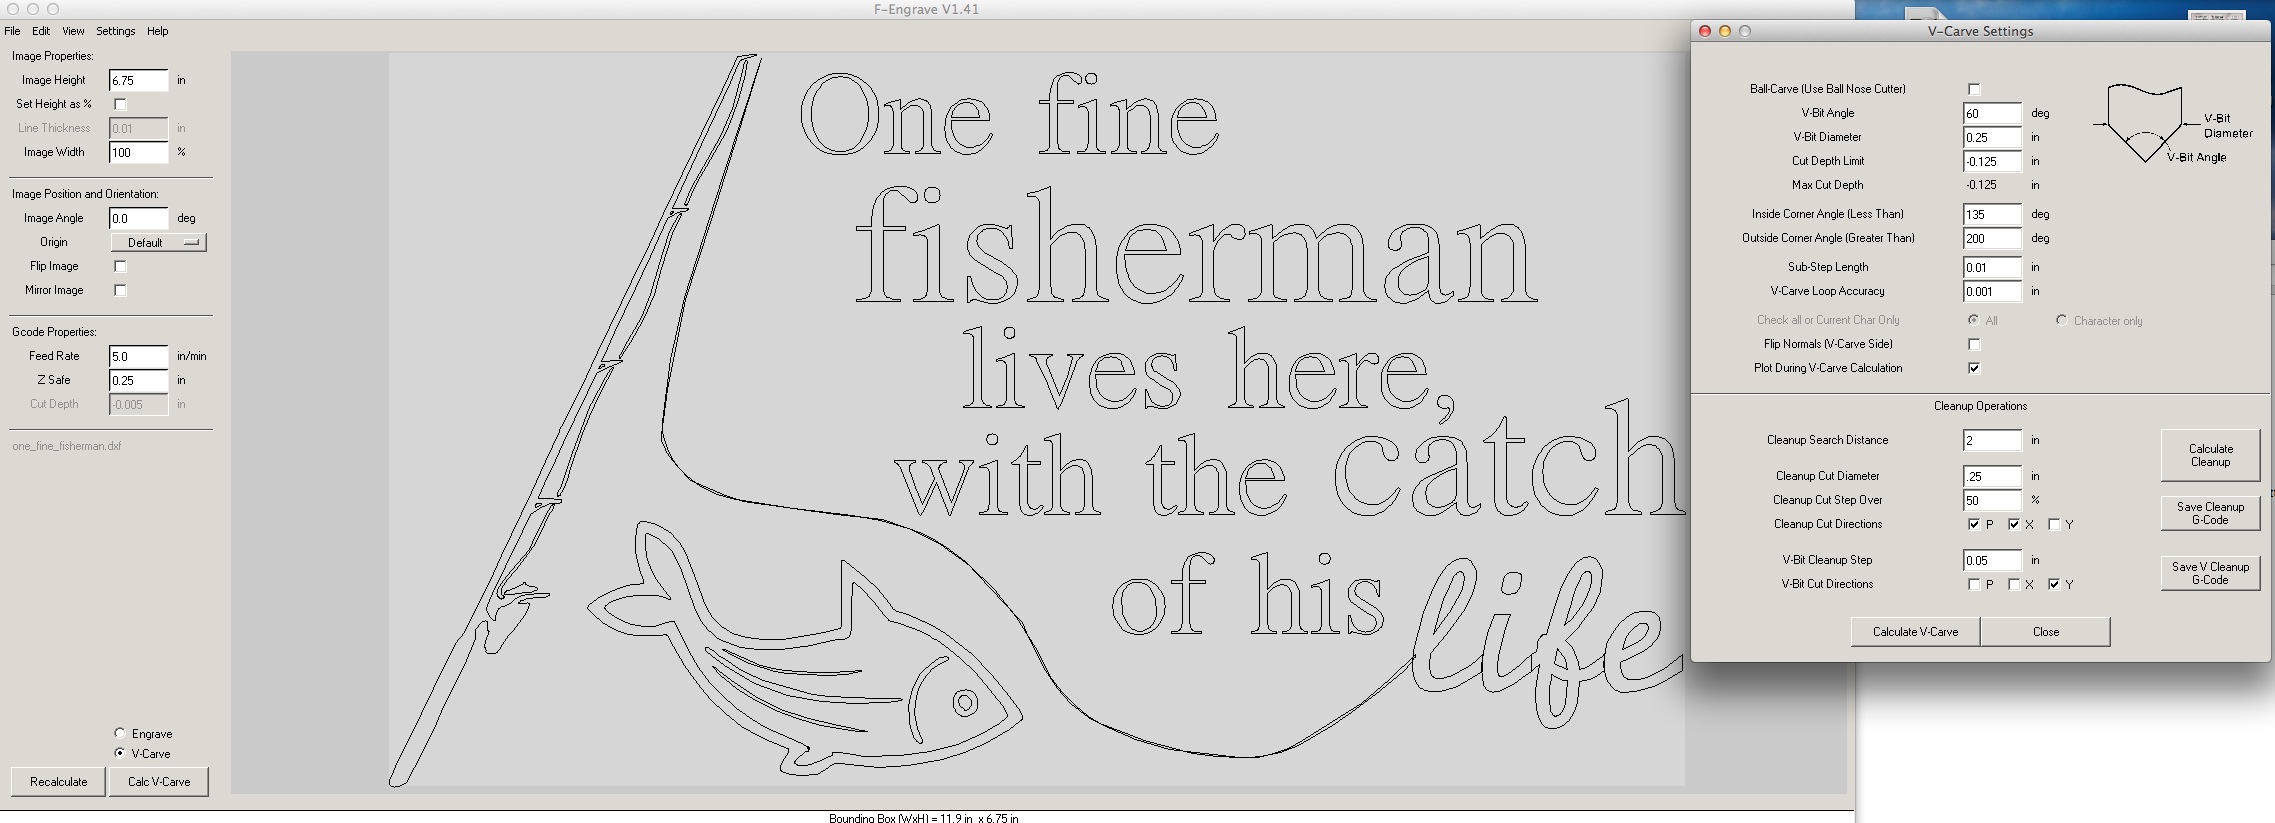
A couple notes are needed on the feed rate and Z-safe in the screen shot. The screen shot is only 5 ipm which is well below what the ShapeOko is capable of. The actual feed rate you should use is dependent on the materials, tool and tool rotation speed. Inventables also has a Materials Wiki published with some recommended feed rates for cutting various materials. My recommendation is to always test first on something that’s the same material as your workpiece. As for the Z-safe the less Z travel you have over the top of the workpiece the faster cutting will go. 1/8″ of an inch is more than sufficient on the ShapeOko with a nice flat board.
Material preparation
There are a couple different ways to prepare the wood for engraving. The main differences are all dependent on how you plan on finishing the piece and if stains or paints are being used. In this example I am using white pine with a nice grain pattern and knot free. You’ll definitely want a knot free piece of wood thats not cupped for a project like this.
For this project I am finishing the wood with an oil based stain and am doing some additional routing of the edges after engraving. The first step is ensuring that your board is smooth, flat and free of surface blemishes and scratches, as these can and will show up when the stain is applied. I sanded the board down with the palm sander I had following the grain and paying attention to the ends. It’s best to use a random orbit sander for this but I only had a cheap $10.00 Harbor Freight palm sander on hand. This can leave swirls on the surface if you are not careful. I followed up with a block sanding with some 200 grit paper to take anything left behind by my cheap tool.
If I was going to paint the wood or fill the v-carving with paint after engraving it’s at this point I would apply a several coats of paint or lacquer to the board. After engraving I would paint into the v-carving and wipe away the excess and let the paint dry. After the paint dries some #000 or #0000 steel wool could be used to clean the surface of any extra paint residue. Once clean I would finish and seal just as I will with the stained sign I am working on now.
Machining Setup and Engraving
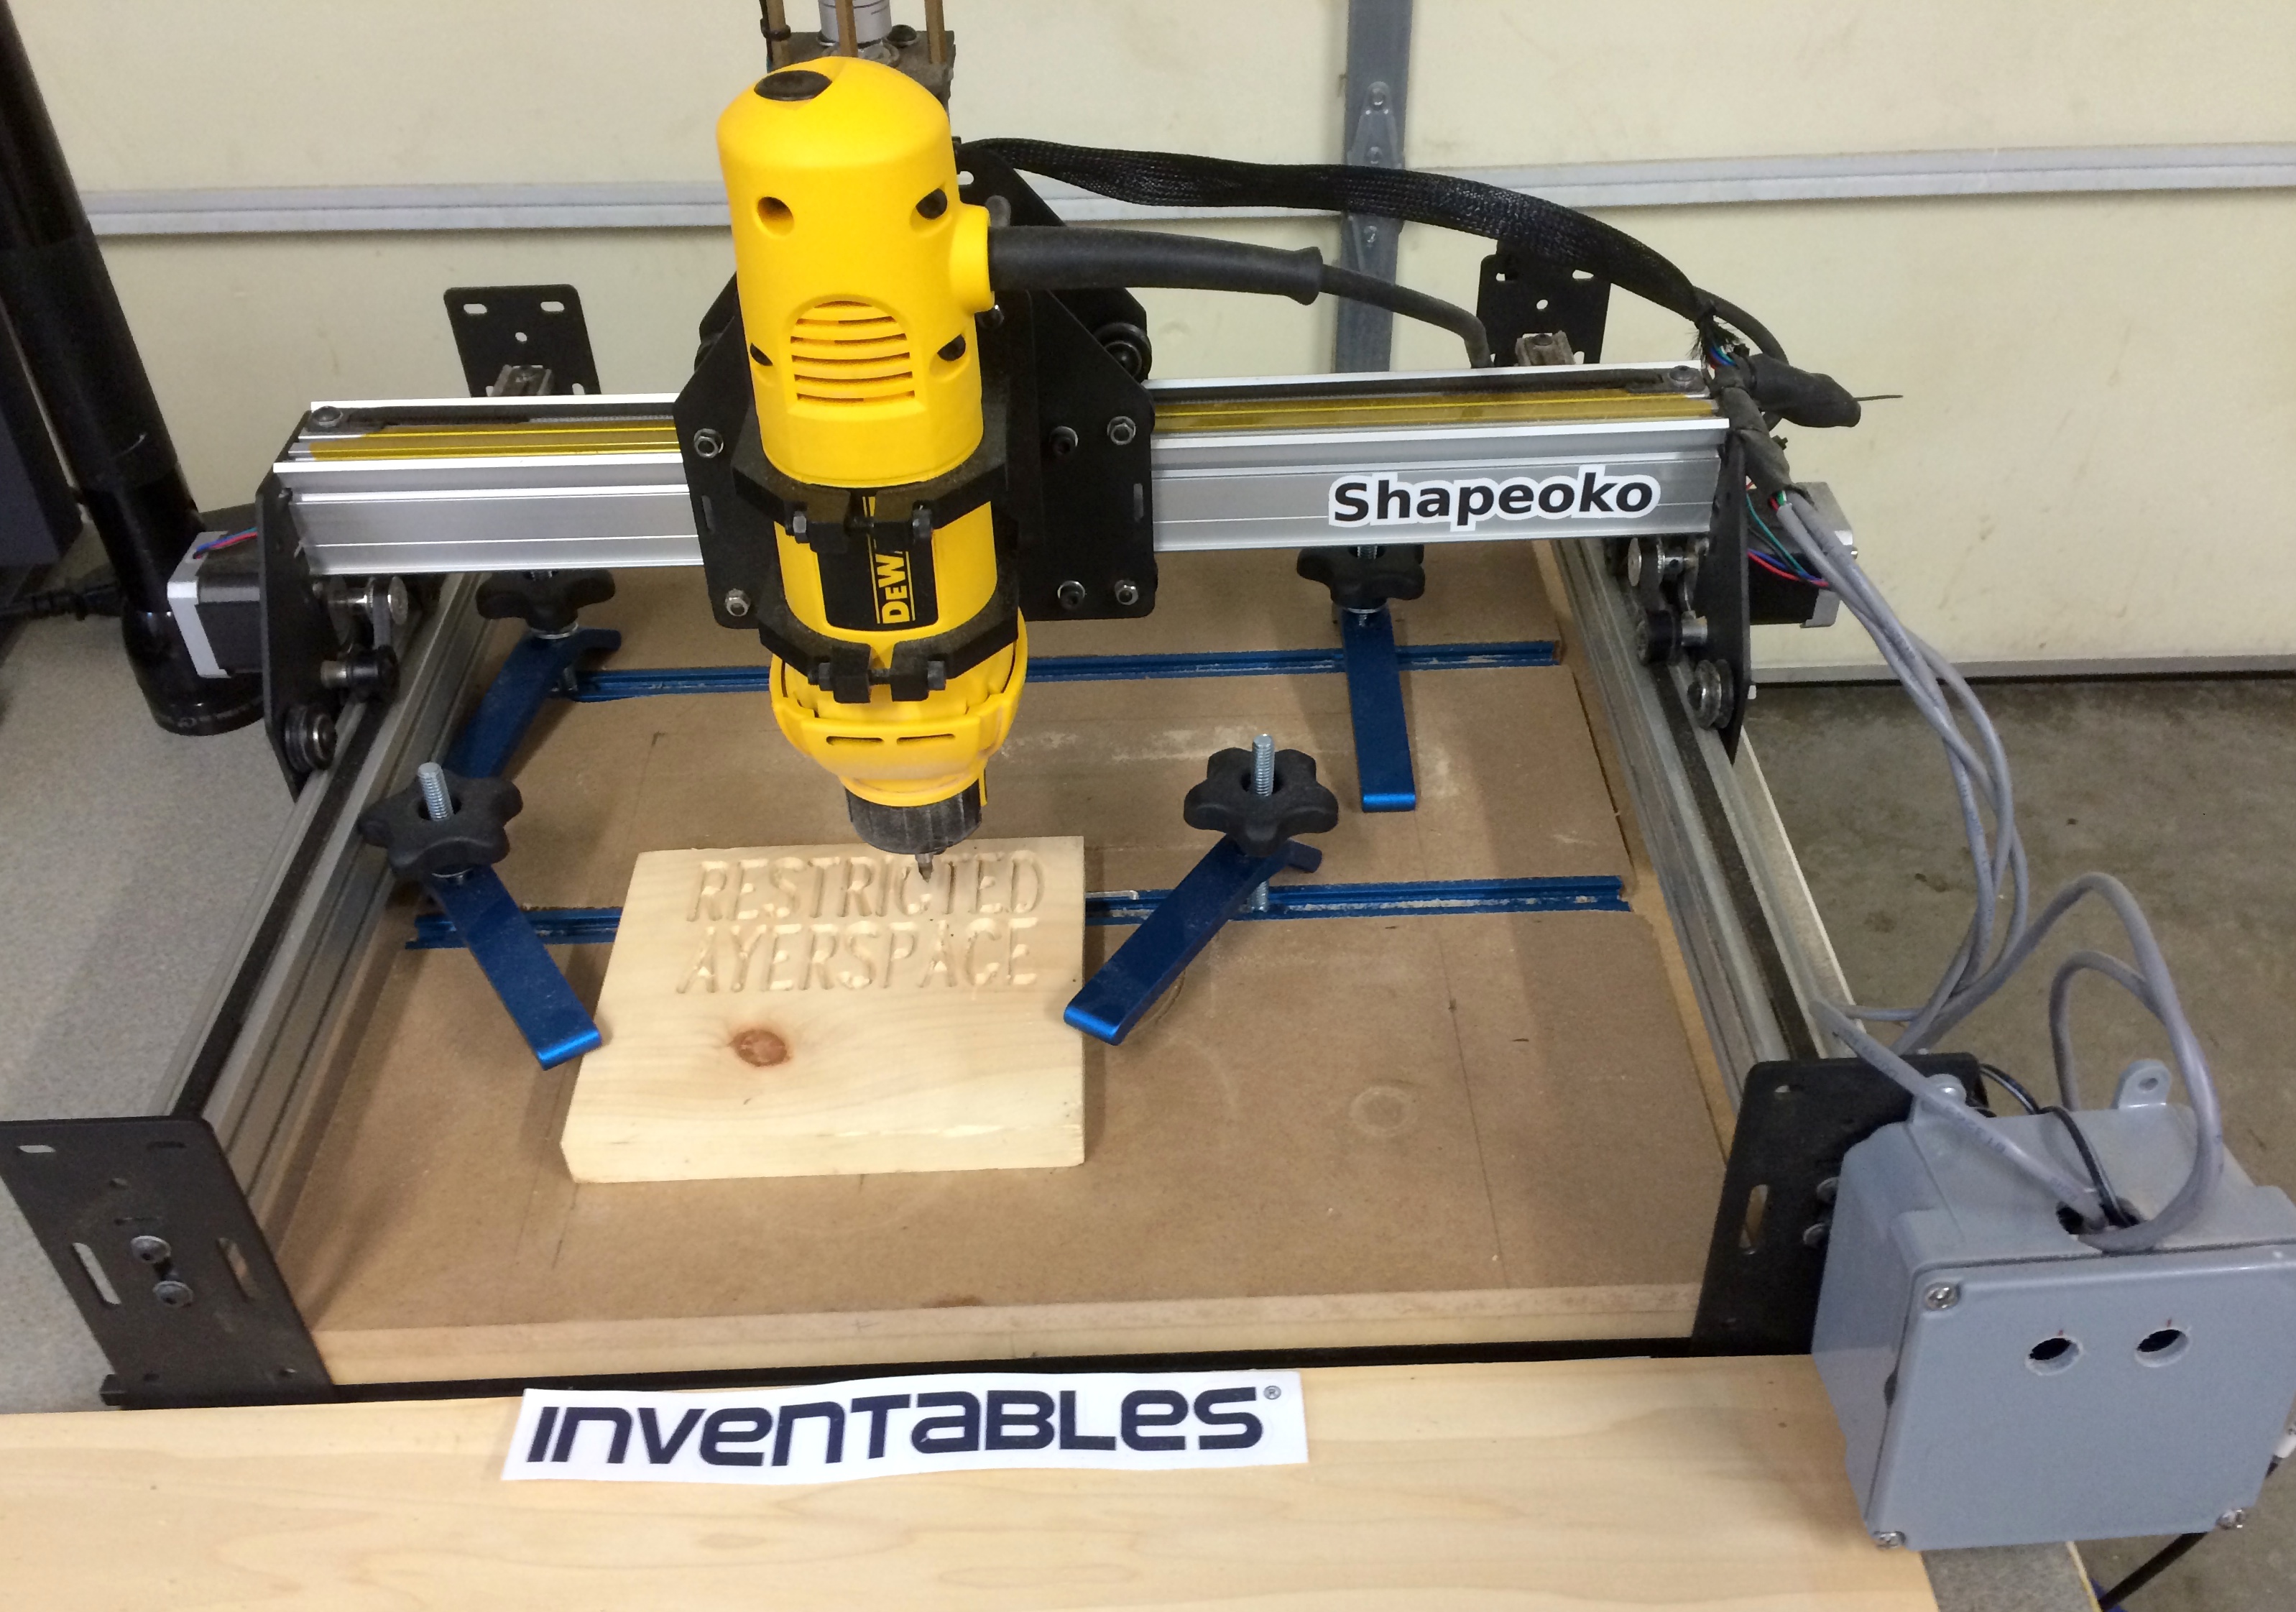
My board was loaded into my Inventables Shapeoko 2 CNC router. My router is stock with the exception of adding a Dewalt DW660 panel trimmer to it , a 3D printed Z-axis knob, and a custom T-Track system that will be done differently in the future. There is a 10+ year old Dell PC running LinuxCNC hooked up to it to send the G-code to the machine and to do editing additional editing and design.
The board is squared up to the edge of the work surface which is also squared up with the X and Y axis of the machine. For this I use a combination square against the front edge of the table and slide it along the edge of the work so it’s aligned. As it’s being aligned the T-track hold down clamps are tightened up.
For engraving I use a 60° bit from Milescraft (#2214) 1/4″ V-groove Router Bit. This is available from Amazon for around $13.00 US and has held up well for several hours of v-carving in hard maple and pine (Purchase here). This is mounted in the 1/4″ collet of the DW660. There are many different bits out there to do engraving with. Just make sure that the F-engrave software knows what you are using to do the cutting. If you are cutting large wide letters you may be better off with a 1/2″ 90° V-groove bit.
After the work is mounted up and the spindle is located at the origin for your design (configurable in F-engrave for flexibility). Use caution lowering your Z axis down to the top of the work piece. I find jiggling a piece of paper under the cutting tool until it grabs is a great way to zero the “Z” without digging into your workpiece and leaving a stray mark which will hold paint or stain later on. After my tool is at 0,0,0 of the work piece I power on the G-shield.
I use Universal G-code Sender to visualize the tool path and send the code to the machine. I’ve found that I usually need to remove the F-engrave comment/header from the G-code to get it to send without an error on the first try (although this might be corrected in Grbl 0.90). I usually load the G-code and then visualize the tool path to make certain the sender and the machine both have the tool in the same position. If everything looks copacetic I hit send and after the tool is raised to the safe Z height I flip the DW660 on.
After I removed the sign from the machine I loaded a decorative router bit into my Porter Cable and put a decorative edge on the sign. Following this the holes for hanging were drilled into the sign. It’s a good idea to do all the cutting that needs to be sealed prior to the finishing so it can adequately be protected from the elements.
Finishing the engraving
I used Minwax Golden Pecan wood finish. It was brushed on in the direction of the grain making sure to pool it up in the v-carving. Depending on the wood, dryness and grain this may or may not work well. I tested ahead of time on a small scrap to make sure I would obtain the desired results. After letting the stain set for 10 minutes I wiped the excess off the the front of the sign leaving the pools in the engraving alone. I let this dry overnight and repeated the process the following day. After it was dry it was rubbed off one more time with some lint free cloth and coated with some Rustoleum Triple Thick Glaze.
The Triple Thick Glaze is excellent giving a nice shiny glazed finish while protecting the material underneath. It dries quickly and is easy to apply without getting orange peel or other nastiness in the finish. After the first coat was applied and dried I rubbed it down with some #0000 steel wool and then used air to blow it off prior to applying the second coat. When that was done I pulled and knotted some twine through the holes to hang it and it was complete.
