A lot of the Sate and National park campgrounds we visit to do not have full-hookups or RV sites. To counter this I wanted to make our camper a little more capable of boondocking or dry camping. The first upgrade that one can do is install some solar panels to keep the lights on, heater running and the water pumping. So I set out and did some research as to what others had done and how they had done it. I settled on a Renogy 200W Monocrystalline Solar system to start with and can upgrade it trivially up to 400W with the addition of two more solar panels – which should still fit on my roof when done.
Preparation:
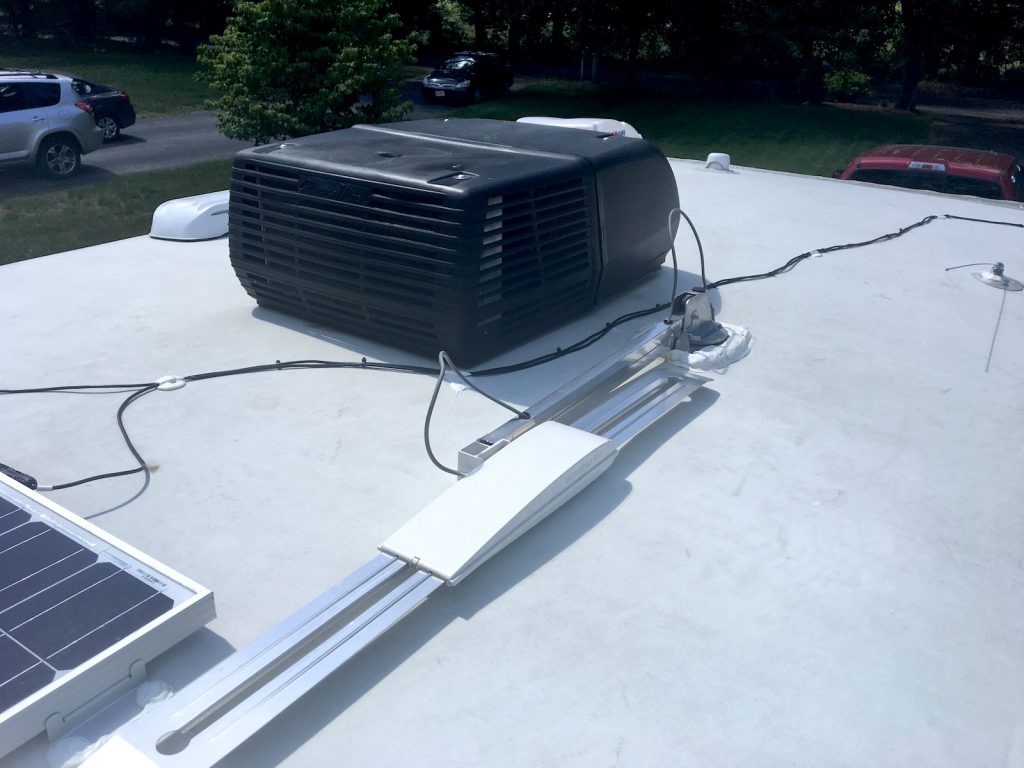
Determine exactly where the panels will be mounted on the roof. Be sure they will not be shaded by the air-conditioner or vent covers if possible as this will reduce the system output. Also take into consideration that the charge controller be mounted as close as possible to the batteries it will be charging. In the Jayco X213 the battery boxes are located on the front tongue of the trailer. Keeping this in mind the charge controller should be mounted somewhere near the front of the vehicle. The system I purchased came with 2 – 2’x4′ monocrystaline 100W panels, all necessary wiring and connectors and mounting brackets. I dry fit the panels on the roof as there are a couple places these could be mounted:

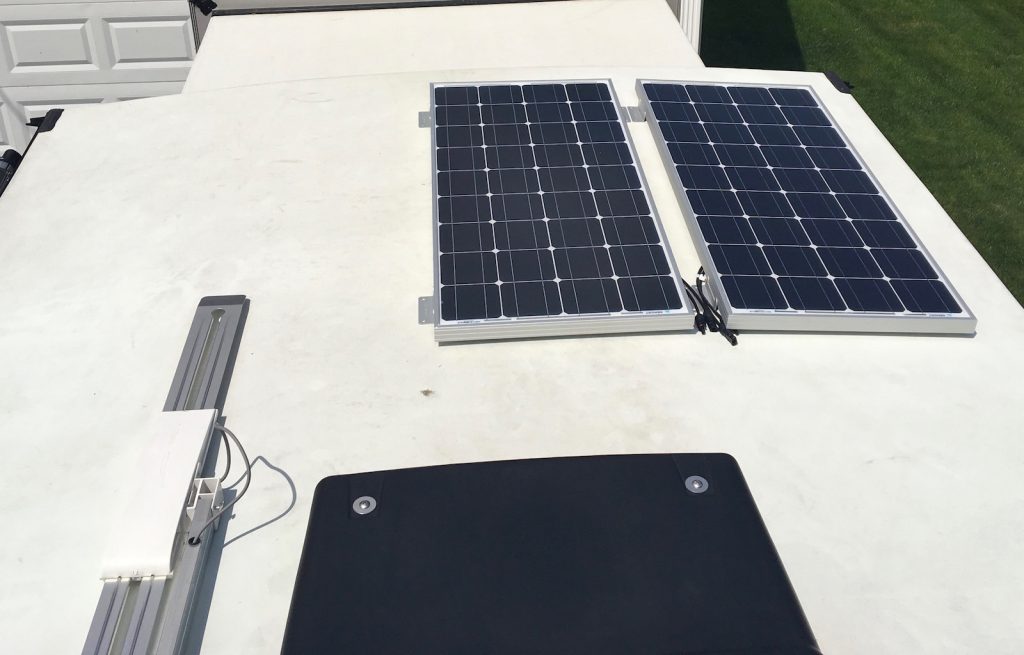
I placed the panels in different orientations to maximize the amount I could possibly add later and to keep them in the best orientation. While not ideal due to it’s distance to the battery the rear of the X213 was the best location for me. The front of the camper has a larger curvature to work with making mounting the panels more difficult. At the rear of the camper I can easily fit 3 panels un-shadowed by the air conditioner and possibly a fourth one later on if necessary. When planning the location of the panels keep in mind how you will get the wires to the charge controller and out to the battery. You should also make an attempt at keeping the wires from the charge controller to the battery as short as possible to reduce loss. I contacted Renogy about this and they responded:
“It is best to keep the distance between your battery and charge controller minimal. Even if this means you have to sacrifice distance between the panels and charge controller.”
There are several places the wires from the panels to the controller could be brought into the camper. One common method is to bring the wires down through the refrigerator vent. Unfortunately on the X213 the entry point would not get us very close to the battery for mounting the charge controller. Ideally the charge controller needs to be located near the front of the trailer and ideal within 10′ of the battery. The closest place that exists on my model is the front cargo hold. This is just close enough that we can reach the batteries under the camper and as I explored, I found some existing wiring in the camper provides easy access to the roof without drilling new holes!
Mounting the Panels:
The first step is to always make sure your roof is clean before sealing it. I used some soap and water to get the bulk of grime off the roof and followed it up with a wipe down with a clean paper towel and Acetone. This helps to prep the surface under all the brackets where I had decided to place the panels for the Dicor. You want the sealant to seal to the membrane instead of the dirt and grime. Dicor makes a cleaner/primer for their product but I did find that acetone breaks down any grime on any existing sealant for touch-ups.
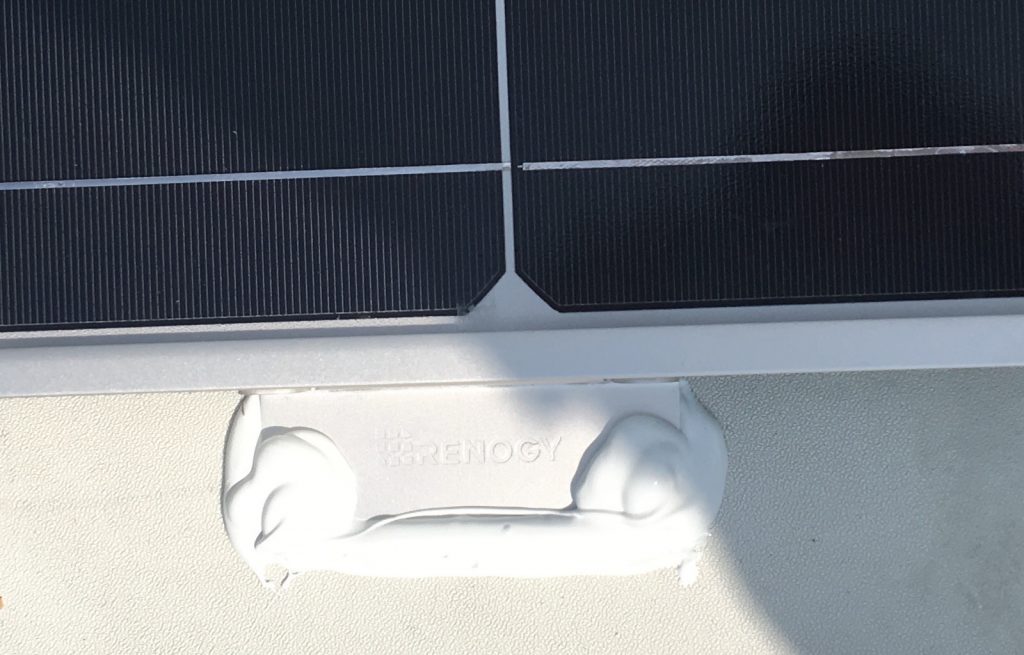
Instead of using the screws that came with the panels (meant for a fiberglass roof) I procured some #14 x 3/4″ sheet metal screws. I did some testing with some brackets in some plywood of similar thickness of the roof. In all cases the aluminum bracket failed and deformed before the screws pulled out of the plywood. Once I was confident that the screws would work I drilled some pilot holes where I decided to mount the panels with an 11/64″ drill bit. The panels were angled up and a bead of Dicor sealant was applied around and over the holes. I laid the panels all the way down in the Dicor then proceeded to tighten down the 8 screws. I used a good old-fashioned manual screw driver for this as I wanted them tight but not so tight they would start tearing the plywood.
Once both panels were secured this way I put more Dicor over the screws and brackets. Don’t be stingy here. The last thing you want to do if find you didn’t use enough.
Mounting the Charge Controller:
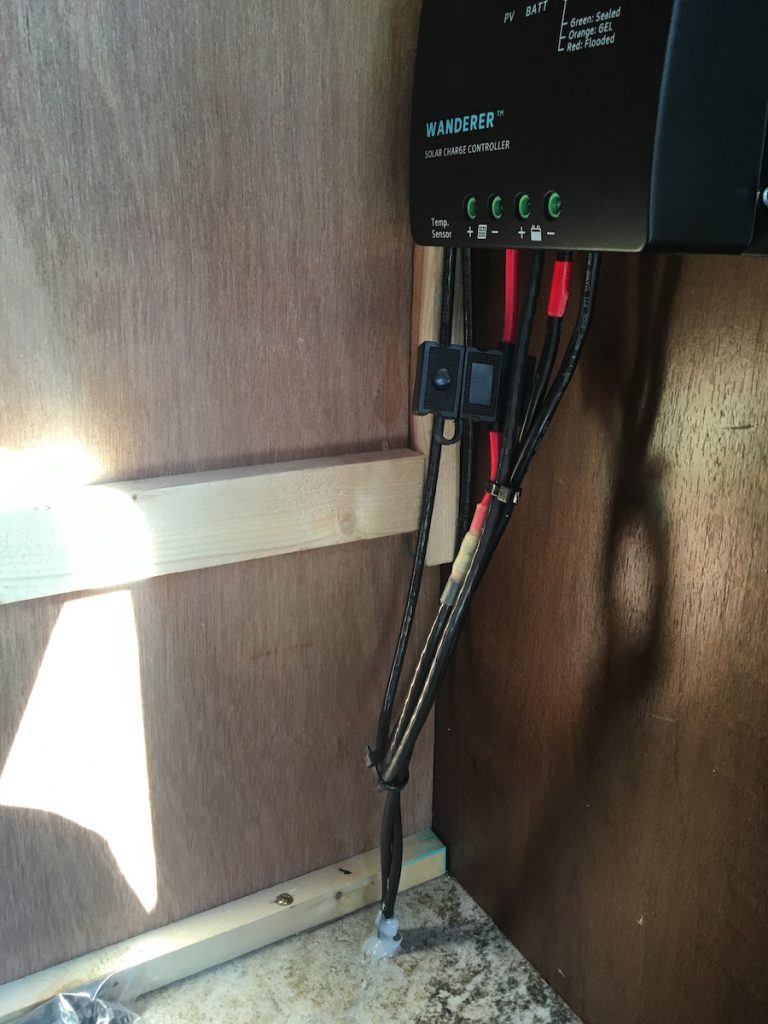
As stated earlier I decided to mount the charge controller where it would be out of the way and close the battery, yet still accessible and easy to monitor or replace if necessary. The best place I could find that was within the recommended 10 feet of the battery was in the front compartment. When mounted against the wall that’s there it’s out of the way from being damaged. It can also be easily monitored from the interior of the camper by simply looking through the cargo door. Originally I had planned on using the prettier Adventurer charge controller mounted near the battery/tank minder inside, but due to the distance from there to the battery I quickly dashed that idea and returned it. On a side note, when I ordered my kit it was cheaper to order the 200W kit with the Wanderer and add on the Adventurer that it was to purchase the 200W kit that includes the Adventurer.
I mounted the Wanderer to the wall facing the front of the camper as the inner wall is exposed to the bunk area and I did not want any screws poking into there. It was fixed to the wall with the included screws. A hole was drilled through the floor and the power cables routed to the battery. Note the instructions explicitly say to make the connection to the battery before connecting to the panels and to disconnect the panels before disconnecting the battery. If this is not done damage to the charge controller may occur. After the wires were routed from the battery to the charge controller I sealed up the hole I drilled with Silicone Caulk. The wires were routed along the frame and held in place by cable ties and passed through the existing grommet in the frame.
Wiring To the Battery:
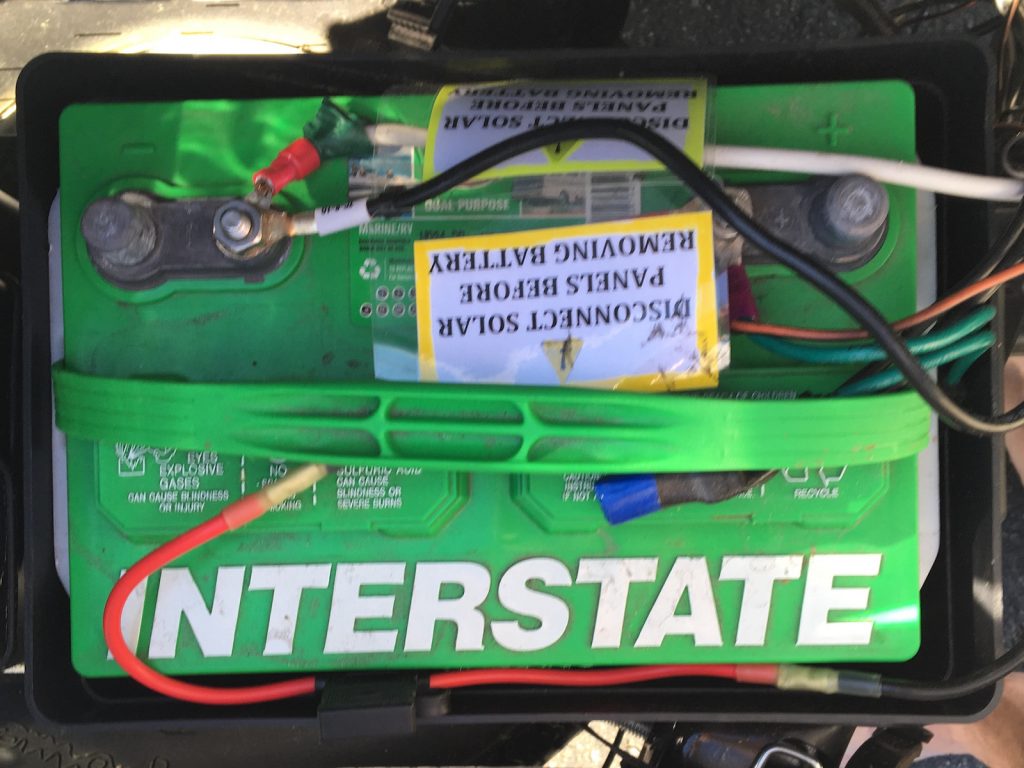
The wiring supplied with the kit was used to make the connections to the battery. In addition I used a 10 AWG Fuse holder inline with the positive lead. Should anything short out I’d rather have this fuse blow than 10 AWG wire melt or worse. The quality of the wiring with the Renogy kit is great and should be more than adequate for a 200W Installation. If you decide to mount your controller elsewhere you will likely need to use a larger gauge wire if you start to exceed 10′ of wring to the battery. The fuse holder I added was spliced in with a 10AWG butt splice connector. These have heat-shrink integrated onto them so they seal the connection and protect it from mixture and the battery off gassing during charging. The positive lead was identified at both ends with RED tape to avoid incorrect wiring should the battery need to be disconnected and replaced.
On that note I added some labels to the positive and negative wires running from the charge controller to the battery. They indicate that the panels should be disconnected before removing the battery (as per the charge controller manual). I don’t know what damage it will cause but I would prefer to not find out and this is cheap insurance. Also note there is a wire-nut in here that the dealer installed with and inline fuse to the breaker panel inside. Again it’s cheap insurance should a wire fray. I may clean this up but I didn’t have any 8AWG butt connectors on hand when I did this wiring. Currently I only have this one 12V Interstate Deep Cycle Flooded Lead-Acid Battery. I plan on upgrading the system later depending on my needs. There are many threads on the merits, maintenance and quality of batteries out there. I suggest reading several articles and forums and forming your own opinion. All flooded Lead-Acid batteries do require maintenance for a long life.
Wiring From the Panels:
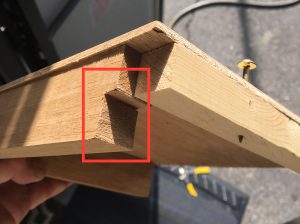
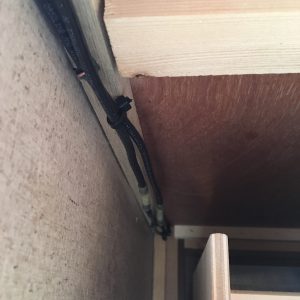
As I stated earlier I found an easy way into the X213’s front cargo area without putting more holes in my water tight roof. While exploring around I stumbled across a little box in the front closet of the camper. This box covered and access hole to the outside where the wiring for the awning motor and led strip light were pulled through to the outside. There is just enough room in the conduit running into here to snake the 10AWG cables through from the solar panels. I ran the wires from the panels along the top of the roof leaving enough to reach the panels comfortably and routed the remainder through the existing wiring hole. I did need to cut away some sealant that was put around the hole to get through. Be sure to leave enough outside to leave a drip-loop at the bottom of the cables so any water that decides to follow them does not have a chance to flow back up-hill into the camper.
I used a fish tape to go from the inside to the outside and then pulled a heavy-duty piece of string back through. The string was easier to manipulate than the fish tape when pulling the wire back in.
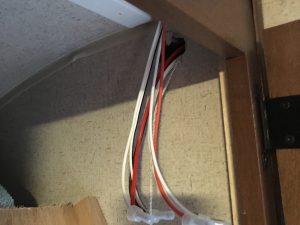
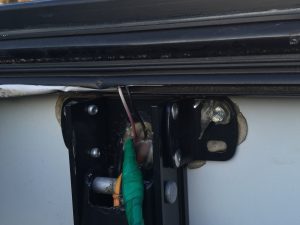
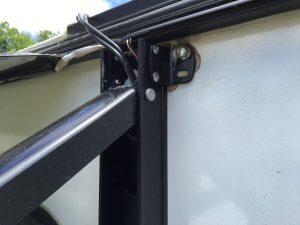
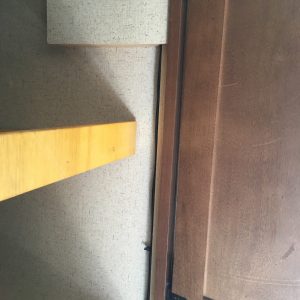
After pulling the wires into the closet I made a slight modification to the cover panel with a coping saw and removed a small corner. Just enough so the two 10 AWG wires could be passed through on the inside of the cabinet. At this point make sure you have the wires routed along the roof approximately where you want them and not taught. Feed in the remaining wire leaving about 2-3″ of extra slack on the outside. This slack is for the drip-loop on the cable. This will prevent any water that’s running off the roof from following the cables back into the camper. Make sure the drip loop is at least an inch below the hole where the wires enter the camper. I simply tucked a little slack down behind the pin that holds the awning on.
Wiring Inside the camper:
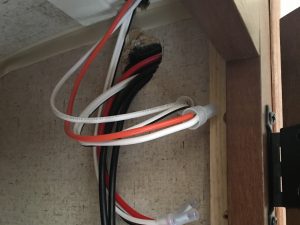
After the wires were snaked through the camper routed the wires along the inside edge the cabinet and down into the cargo area. My cables from the panels were several feet too short and instead of purchasing expensive extension cables with MC-4 connectors on them I made a trip to my local hardware store and purchased 12 feet of 8 AWG stranded cable. I could have utilized 10 AWG here but because I was extending the cabling I wanted to reduce the voltage drop to increase efficiency. I spliced the extensions in with the heat shrink butt connectors and tacked the cables in place with some small wiring staples coupled with wire-ties. The wiring was routed out of the way to the charge controller. A second 30A fuse holder was wired in with the positive lead of the panels (again using the heat shrink butt connectors). This fuse can also act as a disconnect if the batteries need to be serviced by simply pulling it.
Finishing Up:
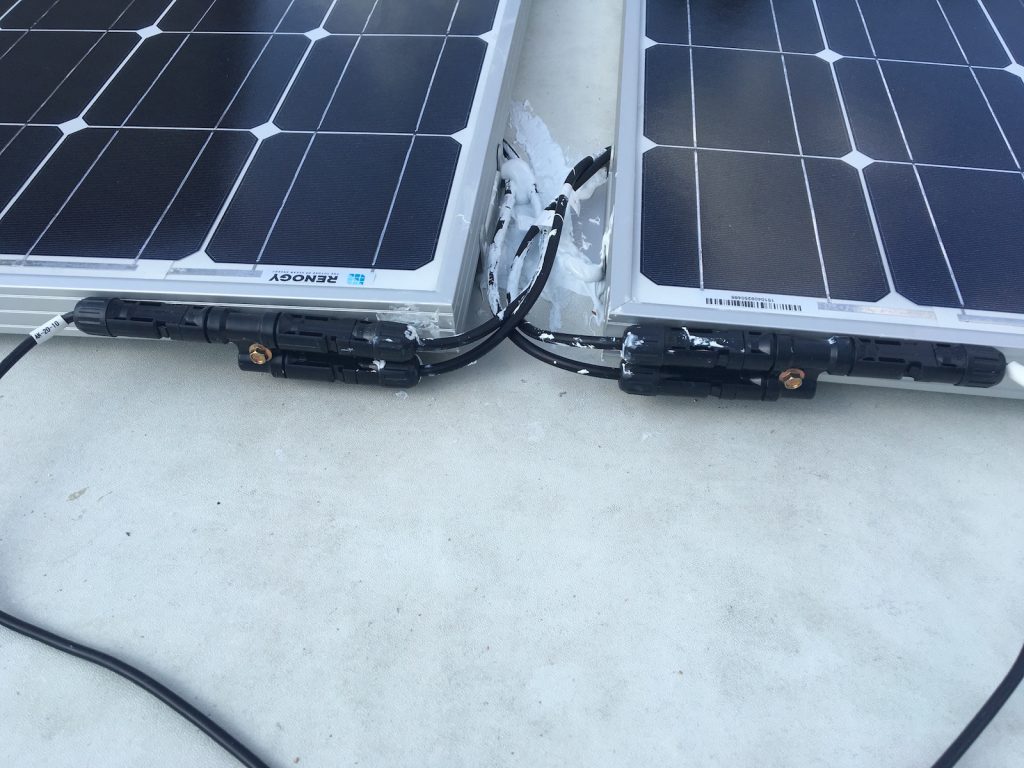
The finishing touch was to affix the wiring to the roof of the camper. This was done by putting half-dollar sized dollops of Dicor over the cables periodically where they lay on the roof. It helps to put some weights on the wires so they don’t shift and stay put where you want them anchored. This prevents the wires from flopping around. I also mounted the MC-4 splitters to the sides of the solar panels so they were not sitting directly on the roof. Please ignore the mess of Dicor on the wires here. It was difficult to manage the wires and place the panel down without an assistant.
In the end:
The solar install was successful. I have zero leaks and zero water infiltration after several thunder storms which dropped multiple inches of rain. From the ground you cannot even tell the solar panels are installed and inside the wiring is tucked away where you won’t see it unless you are looking for it. This keeps my battery topped off and will hopefully allow me to boondock and dry camp comfortable with heat, lights and running water. I plan on wiring a couple 12V receptacles and/or USB device charges in as well. In addition some 12V inverters will also be carried so if needed I can run the TV or Charge Laptops. I’m pretty happy with the way the install came out and the performance of the system for the price.
Purchase the solar system here:
Renogy 200 Watt 12 Volt Monocrystalline Solar Starter Kit with Wanderer
The Renogy Adventurer – 30A PWM Flush Mount Charge Controller with LCD Display
Dicor 610SASLW1 White Roof Lap Sealant – 10.3 oz. Tube
Heat Shrink 10 AWG Butt Splice Connector
#14 x 3/4″ Stainless Steel Pan Head Sheetmetal Screw
Tools Used:
Cordless Drill & Drill Bits (11/64″ for #14 screws and 1/2″ to go through the floor)
Caulking Gun
Philips Head Screwdriver
Utility Knife
Wire Strippers/Cutters
Wire Crimping Tool
Hammer
Coping Saw