Category: Electronics

Chicken Coop Controler Version 2

Chicken Coop Controler Redux


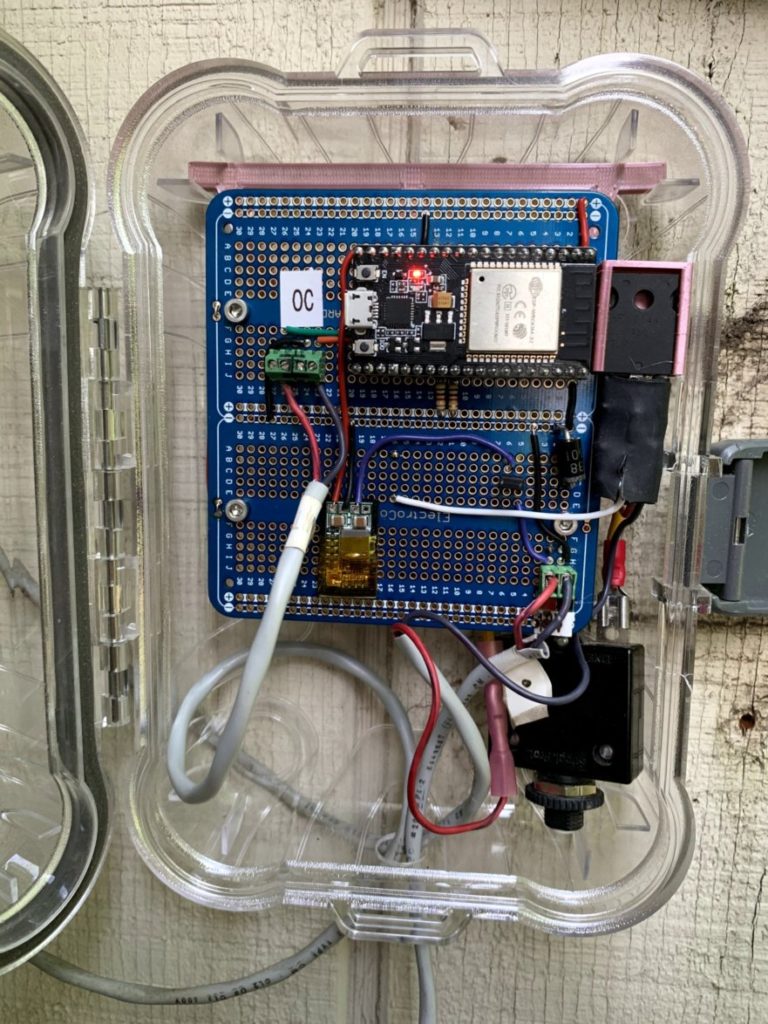
After over a decade of service my original coop controller finally died.  This was no fault of it’s own the old 12V AGM battery died and when I hooked up the new one I did so with the incorrect polarity.  This was rapidly followed but a “pop” and the dreaded magic smoke escaping from it.  The flyback diode took the brunt of the damage it followed by the speed controller FET.  Because of this I felt it in my best interest, instead of reviving the old board I would start anew with more goodness.  The original controller suffered from a few problems:

  • It was difficult to tell if the door was actually up or down from the house
  • When it got an error (i.e. chicken poop prevented the door from closing) it was hard to reset
  • It utilized a CdS sensor I pulled from a smoke detector which wasn’t temperature stable year round
  • It was a custom arduino board and the chip needed to be pulled and put in a programmer to update the firmware (whch is lost to time)
Read more

GRBL Postprocessor for Solidworks


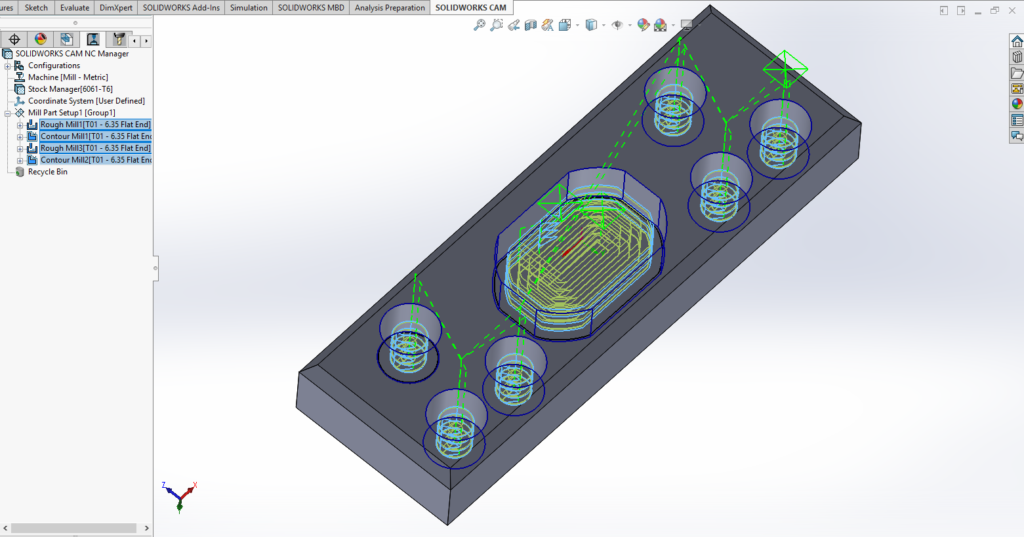
As part of mentoring out High School’s First Robotics Team Andromeda One I have learned Solidworks.  Since we have a Jet Mill converted to CNC (running GRBL and a Chinese controller) and several of the other mentors, including myself, having CNC routers like the ShapeOKO 2 and X-carve we wanted to be able to have a one-stop shop for doing our design and CAM toolpath generation.  There are some generic postprocessors for Solidworks but none seemed to support exactly the post processing options and syntax I wanted to see.  As such I embarked on writing my own post for Solidworks.

I downloaded “Universal Post Generator” from Camworks who provides the CAM functionality for Solidworks.  This can be found here:  https://camworks.com/universal-post-generator/

When installing it is necessary to install it as Administrator.  If you do not it will not install properly/fully and may not work properly.  I then used this tool to edit a Postprocessor from scratch and compile it into something Solidworks understand.  Note, this was not very straight forward and resulted in several iterations of trial and error until I got it close enough.  I’m still getting syntax errors on comment lines.  For some reason the line starts with an “*” then the line number and then the tool comment.  I cannot determine where this “*” is coming from in the post or how to get rid of it.  The second issue is the line numbers,  These are very much a personal preference but even if they are disabled in the post configuration they still appear on the output in Solidworks.  In the end the postprocessor output needs to be post processed to run on my CNC with a text editor to fix the tool comment lines.

You can download the fruits of my labor here: SW_GRBL_POST.zip

Read more

Programming Chinese Arduinos on Mac

I recently purchased a package fo some cheap Arduino Nano development boards from Amazon.  For a couple bucks more you get 5 instead of 3. The only downside is they have the CH340G serial chipset.  In order to get these to program on the mac and avoid the stk500_getsync() errors a couple steps need to be followed:

  • First download the latest serial driver for OSX from the vendors website here:  Mac CH341 Serial Driver
    • Follow the installation instructions in the readme.
    • I had an old driver installed so I removed it first before installing the new driver and rebooting my machine
  • Connect the serial cable and open the Arduino IDE
    • In the IDE make sure you have the Arduino Nano selected and the appropriate com port
  • This step is critical in the Tools menu select the Atmega328P (Old Bootloader) option.
    • If you don’t to this you will still get stk500_getsync errors.

Hope this is helpful for someone having these issues.

HomeKit Control of X10 Devices

HomeKit serves as a software framework that lets users set up their iPhone to configure, communicate with, and control “smart-home” appliances.  By designing rooms, items and actions in the HomeKit service, users can enable automatic actions in the house through a simple voice dictation to Siri or through apps.  This is also a closed protocol which also means only registered vendors can have their products certified to work.  In addition X10 was a protocol developed in developed in 1975 for home automation.  Because it’s been around for a while the devices are somewhat cheaper but  this also means that it doesn’t sport a connection to the newest protocols like HomeKit.  I experimented with voice control years ago (circa 2000) with HomeSeer but was never satisified with the quality and the fact that I would have to wire microphones all over my house.  Now that we have Siri and other fantastic voice recognition and this cool HomeKit integration the future for this old protocol is now.

Read more

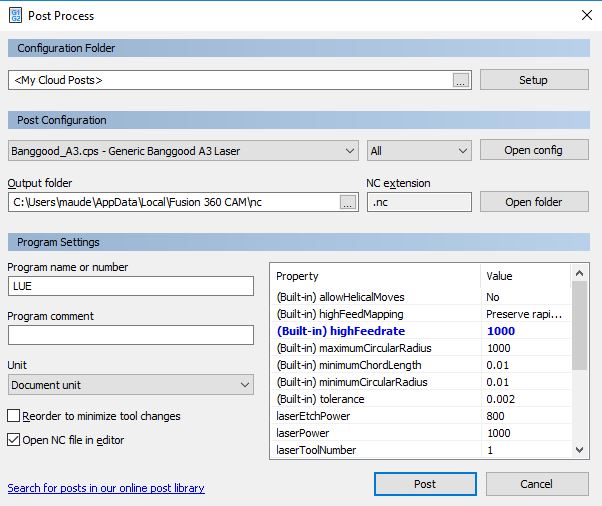
Banggood A3 Laser Post for Fusion 360 Laser CAM

Fusion 360 is an awesome CAD/CAM package from Autodesk.  The licensing is reasonable,  the support is good, the CAD/CAM is top notch and it runs on both macOS and Windows 10.  Recently I acquired a Banggood A3 2.5W Laser Engraver and decided, since I had a good tool chain for cutting on my ShapeOKO I may as well carry that over to my Laser.  I started with GRBL 1.1d (edge) release which was just just came out and built it using the PlatformIO IDE.  I did this on my Mac and uploaded the resultant hex file using Xloader on my PC that’s connected to the laser.  The compiled hex I used for my Atmega328 Nano that was installed on my laser is below.  Please note if you were not running GRBL 0.9 on your laser prior you should remove the nano and set the jumper to 0.9 on the controller board.  Note if you are using a Smoothie board you can just follow along with the tool path and gcode generation portion that follows and use the Smoothie post that is already included.  The GRBL post that’s included does not support the new waterjet/laser features.

Read more

512KB ESP-01 WiFi Honeypot

File Jul 20, 6 37 03 PM

After seeing an awesome Hack-a-Day “RickRolling” Free Wi-Fi access point based on a node MCU I wanted to see if I could do something similar on my tiny 51KB ESP-01 module.  While annoying as all heck this “hack” is pretty clever and involves social engineering to rick-roll people.  The users is lured in by free wifi that does not exist and then a message of the designers choice is displayed on their screen.  The original can be found at Hack-a-day: ESP8266 Mobile Rick Roll Captive Portal – and like mine was based on the work of others.  This was designed for a NodeMCU ESP with 4MB of flash – not the 512KB not found on the paltry ESP-01 – although the original “Captive Portal” did run on an ESP-01 it was much more limited in support.  This project also gave me an excuse to try out the new PlatformIO IDE and dust-off my unused ESP-01 modules.   Read more

An Apple users review of SurfacePro 3

Aside from a mouse and keyboard or XBOX 360 console game this is the first Microsoft product I have purchased in around 6 years.  I switched to Apple products after spending over $2500 on a high-end Intel Xeon powered quad core HP workstation which was running Windows Vista and having it burn up on me after two weeks of use.  Not only that but the windows Vista transition from XP was painful and the constant dialogs that would pop up destroyed my workflow.  Based on the learning curve alone and the quality of even high-end hardware I sent back the HP machine and purchased a Mac Pro Desktop instead.  I have been an Apple fan ever sense.

Apple products usually “just work” out of the box.  Sure there was an initial learning curve and there weren’t a ton of games.  For some reason OS X is seen as as a second tier by game vendors still, mainly for how it chose to support graphics.  This article isn’t about Apple products though it’s about the new Microsoft Surface Pro 3 and it’s only fair to let you know where I’m coming from.  The Surface Pro 3 I am using was purchased from Costco as a package with the click keyboard and stylus.  It’s a mid tier model with the following Specs:

  • Core i5 4300U CPU
  • Intel HD4400 Graphics
  • 4 GB RAM
  • 128 GB Internal Flash
  • Click Keyboard
  • Stylus
  • Windows 8.1 Pro
  • MicroSD, USB 3.0 and MicroDisplay ports
  • Docking/Charging port

Read more

ShapeOKO 2 Grbl 0.9G Upgrade

I was cutting on my ShapeOKO 2 last weekend and having major issues with missing steps on the Z.  During fast retracts the Z would just hum resulting in passes where the tool wouldn’t clear the work resulting in more or less catastrophic failure.  Either the work piece was damaged or the bit from trying to be forced through way more material it should be before I hit the e-stop.  After some research I came to the conclusion that the stepping was the culprit.  The steppers are configured correctly, wired correctly and moving as freely as possible but the controller would step at a rate that was causing issues on the Z.

After a little research I found that there was an update to GRBL version 0.9G that in addition to having a better acceleration planner the maximum feed rates could be configured per-axis.  This is a pretty big deal because in 0.8C all the axis are limited by your slowest axis – which is the Z.  Because of this cutting speeds are severely limited on the axis that one spends most of the time cutting on.

Read more

Electrodragon ESP8266 (Wi07C) Module Notes

I recently ordered up a few of those super-cheap ESP8266 wifi modules.  These have an 80211 b/g/n Wifi with WPA/WPA2 support, are super small and have a fairly powerful CPU on board (more powerful than that Arduino I am hooking it up to).  I ordered my modules from Electrodragon and they came super-fast (and even shipped from state-side).  For ~ $25.00 I got 4 pieces shipped to my door.  In hindsight I should have ordered a couple of the modules with all the GPIO pins exposed.  The first order of business is interfacing.  These modules utilize a 3.3V power supply and IOs.  I utilized my $17.00 Arduino Mega with 3.3v selector to be voltage compatible instead of setting up voltage dividers.

There are 5 critical pins needed to get this working:

  • GND – Connect to Arduino GND
  • VCC – Connect to Arduino 3.3V VDD
  • UTXD – Connect to Arduino Mega RX1
  • URXD – Connect to Arduino Mega TX1
  • CH_PD – Connect to Arduino 3.3V VDD

Read more