Author: Mike

Programming Chinese Arduinos on Mac

I recently purchased a package fo some cheap Arduino Nano development boards from Amazon.  For a couple bucks more you get 5 instead of 3. The only downside is they have the CH340G serial chipset.  In order to get these to program on the mac and avoid the stk500_getsync() errors a couple steps need to be followed:

  • First download the latest serial driver for OSX from the vendors website here:  Mac CH341 Serial Driver
    • Follow the installation instructions in the readme.
    • I had an old driver installed so I removed it first before installing the new driver and rebooting my machine
  • Connect the serial cable and open the Arduino IDE
    • In the IDE make sure you have the Arduino Nano selected and the appropriate com port
  • This step is critical in the Tools menu select the Atmega328P (Old Bootloader) option.
    • If you don’t to this you will still get stk500_getsync errors.

Hope this is helpful for someone having these issues.
K40 LASER Chiller

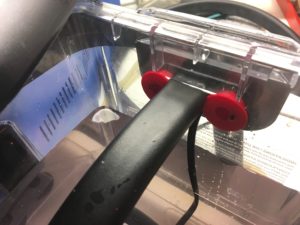
I recently renovated an Iceman Clear3 Chiller I had recieved from someone who had a knee replacement.  The pump no longer worked but I kept this around for the hose quick disconnects and the nice bucket.  When I removed the two screws holding the pump in the nice trim plate on the back fell off.  So I whipped up these retainers in Fusion 360 and printed them out on my trusty old Makerbot Thing-O-Matic and about 10 minutes later I had it back together.  Works like a charm, looks nice, and as a bonus I can see the water flowing into the tank.  Just drop in a couple Blue Ice to keep things chill for the long jobs and replace them later.

Retainers installed with original hardware in the back of the chiller

You can download the STL for the retainers on Thingiverse:  Iceman Chiller Backplate Retainer

Read more

Getting Started with your new Jayco X213 or any Travel Trailer

I am writing this post to let new owners of a Jayco Jayfeather X213 or similar recreational vehicle what they need to bring along with them on their camping trips.  The camper comes well equipped from the factory but several items are required to make your vehicle completely usable and enjoyable on a camping trip.

Bare necessities
  • Utilitiy Connections
    • 30A to 20A Adapter – You might not be able to run everything but you will at least have power if you need it and there isn’t a 30A Socket
      • Also handy when you are setting up at home since more often than not you will not have a 30A exterior socket on your home.
      • A heavy-duty extension cord would also be good.  If using a cable over 25 feet get a 10 Guage one instead.
    • Sewer Hose and Clear Elbow – If you are going to make a sewer connection or clean out you black and grey tanks
      • The clear elbow makes it easy to tell when your black tank is clean
      • You will also need black tank deodorizer.  I prefer the Porta-Pak portioned tablets but there are many options out there
      • Rapid dissolving toilet tissue is also highly recommended, the last thing you want to do while camping is unclog your sewer line
      • A hose support is also good to have to keep sewer moving in the right direction
    • Fresh Water Hose – to connect to the city water connection
      • Optionally a fresh water filter will remove some of the bad odors that can be found in some campground water
      • Sometimes water pressure can be amazingly high at campgrounds and as such can damage some of the plumbing in your camper. This makes a water pressure regulator also good to have and is cheap insurance against over pressure damage.
      • If you are dry-camping but have access to a spigot you can fill your freshwater tank with this water bandit.
      • Important: Never use your freshwater hose to connect to anything other than city water and never use it near a dump station!
  • Site Setup
    • Wheel chocks such as these light weight ones for lots of travel or these heavy duty X-Chocks when you are going to be around for longer
      • I have these One-step chocks and they lock the wheels nearly as well as X-chocks but setup way faster
    • Leveling blocks like the Tri-Lynx to level your camper side to side
      • You could use wood, however you don’t want to carry wet or insect laden wood between campsites.
      • Some campgrounds may prohibit any wood from being used
    • Stabilizer Jack Pads – to protect your landing gear from rusting on the ground
    • Tongue Jack Stand or something hard like the stabilizer jack pads for the tongue jack
    • A tongue or coupler lock – nothing can shorten a trip like a missing camper

Once you have the basic supplies for your site setup you can prepare your camper for the road.  I always go-through my pre-travel checklist to make sure I am ready to go.

Read more

HomeKit Control of X10 Devices

HomeKit serves as a software framework that lets users set up their iPhone to configure, communicate with, and control “smart-home” appliances.  By designing rooms, items and actions in the HomeKit service, users can enable automatic actions in the house through a simple voice dictation to Siri or through apps.  This is also a closed protocol which also means only registered vendors can have their products certified to work.  In addition X10 was a protocol developed in developed in 1975 for home automation.  Because it’s been around for a while the devices are somewhat cheaper but  this also means that it doesn’t sport a connection to the newest protocols like HomeKit.  I experimented with voice control years ago (circa 2000) with HomeSeer but was never satisified with the quality and the fact that I would have to wire microphones all over my house.  Now that we have Siri and other fantastic voice recognition and this cool HomeKit integration the future for this old protocol is now.

Read more

ReadyNAS NV+ Gmail Configuration


I finally tracked down the “Blocked Sign-in Attempt” messages on my Gmail account.  My old ReadyNAS NV+ had alerts setup on it using my Gmail SMTP.  Unfortunately Google has limited access to SMTP unless you allow less secure apps.  I didn’t want to allow this on my main e-mail account so I setup a “relay” account that I could enable the less secure access in. Read more

Thing-O-Matic Repair and Upgrade

I recently upgraded my build surface from Kapton tape on Aluminium to BuildTak.  I was a little concerned about this because like everything else there are rumors that ABS won’t come off.  But I figured for the price for 3 sheets for my little Thing-O-Matic it was worth a shot so I didn’t have to deal with blue painters tape if I wanted to switch to PLA.  I found my BuildTak on Amazon for around $8.00 (3 sheets).  I peeled off my old Kapton tape and cleaned off the print bed.  I will say this is way easier to install than Kapton since it’s a small area and the tape forms nice bubbles under it when it adheres to the platform.  I used the edge of a credit card to ensure good adhesion to the platform.

Read more

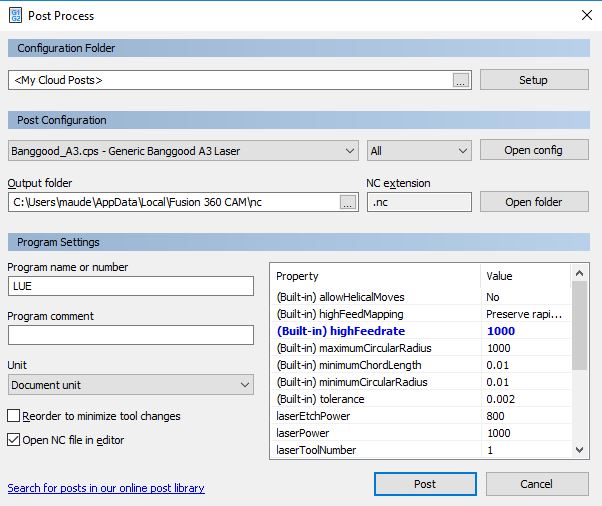
Banggood A3 Laser Post for Fusion 360 Laser CAM

Fusion 360 is an awesome CAD/CAM package from Autodesk.  The licensing is reasonable,  the support is good, the CAD/CAM is top notch and it runs on both macOS and Windows 10.  Recently I acquired a Banggood A3 2.5W Laser Engraver and decided, since I had a good tool chain for cutting on my ShapeOKO I may as well carry that over to my Laser.  I started with GRBL 1.1d (edge) release which was just just came out and built it using the PlatformIO IDE.  I did this on my Mac and uploaded the resultant hex file using Xloader on my PC that’s connected to the laser.  The compiled hex I used for my Atmega328 Nano that was installed on my laser is below.  Please note if you were not running GRBL 0.9 on your laser prior you should remove the nano and set the jumper to 0.9 on the controller board.  Note if you are using a Smoothie board you can just follow along with the tool path and gcode generation portion that follows and use the Smoothie post that is already included.  The GRBL post that’s included does not support the new waterjet/laser features.

Read more

Jayco X213 Quick Table/Work Surface

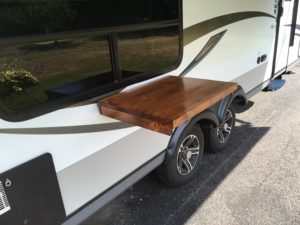
I recently found some nice hard pine thrown away from a wood processing place down the road and a scrap piece of what looked like an aluminum awning track at my local transfer station/dump.  The channel fit the exterior grill mount so I decided to whip up a quick table with the discarded pine I had found.  This mounts on the exterior of the camper with the channel and a paint-stick extension.  The paint stick serves double duty along with a brush head to remove the debris from the slide-out before pulling it back in.  The construction was simple and was built based on some quick measurements I did.

IMG_1123
Mounted on the trailer.

Read more